


_ANZ-Group-shot_v2.png?w=100&v=f3a4afac-70ac-4758-8474-ff17fe163b1c&itok=Z_Qi2FlQ)


.png?w=100&v=76611618-74f9-4150-85bd-f3f88e49eece&itok=5ehAJg_Q)


.png?w=100&v=5053a26b-c336-46d9-b44e-ab91738f07c9&itok=efvsqCNL)


.png?w=100&v=d5f9955a-145e-481e-8081-5ddf4d74c7cc&itok=hKuNtBOw)


.png?w=100&v=2695a42f-b099-4e31-bdbd-c1b445ff88c0&itok=Md9-7E8t)


%20(2).png?w=100&v=a9b7928b-cece-4e51-b913-62ae316129a9&itok=fEHREjki)
_ANZ-Group-shot.png?w=100&v=72a4a24c-7670-47f7-a68e-edeaafa41c8d&itok=k25pq8iJ)
_ANZ-Group-shots.png?w=100&v=4d5e1cd2-60a9-45da-bcfb-1b8500ccaea9&itok=v6A67Pxg)


Drill into timber, soft metal and hard materials including brick and concrete with the RYOBI 18V ONE+ Hammer Drill.

Create a feature wall for your loved ones and special moments – things that will bring a smile to your face on the gloomiest of days. Step-by-step guide by Nick Compston.
Beginners level.
NOTE: We recommend that before drilling into internal walls that you turn off the power to the that section of your home to avoid injury or damage.
Arrange your photo frames into the desired layout on a table or the floor (be careful not to exceed the space you have on the wall).
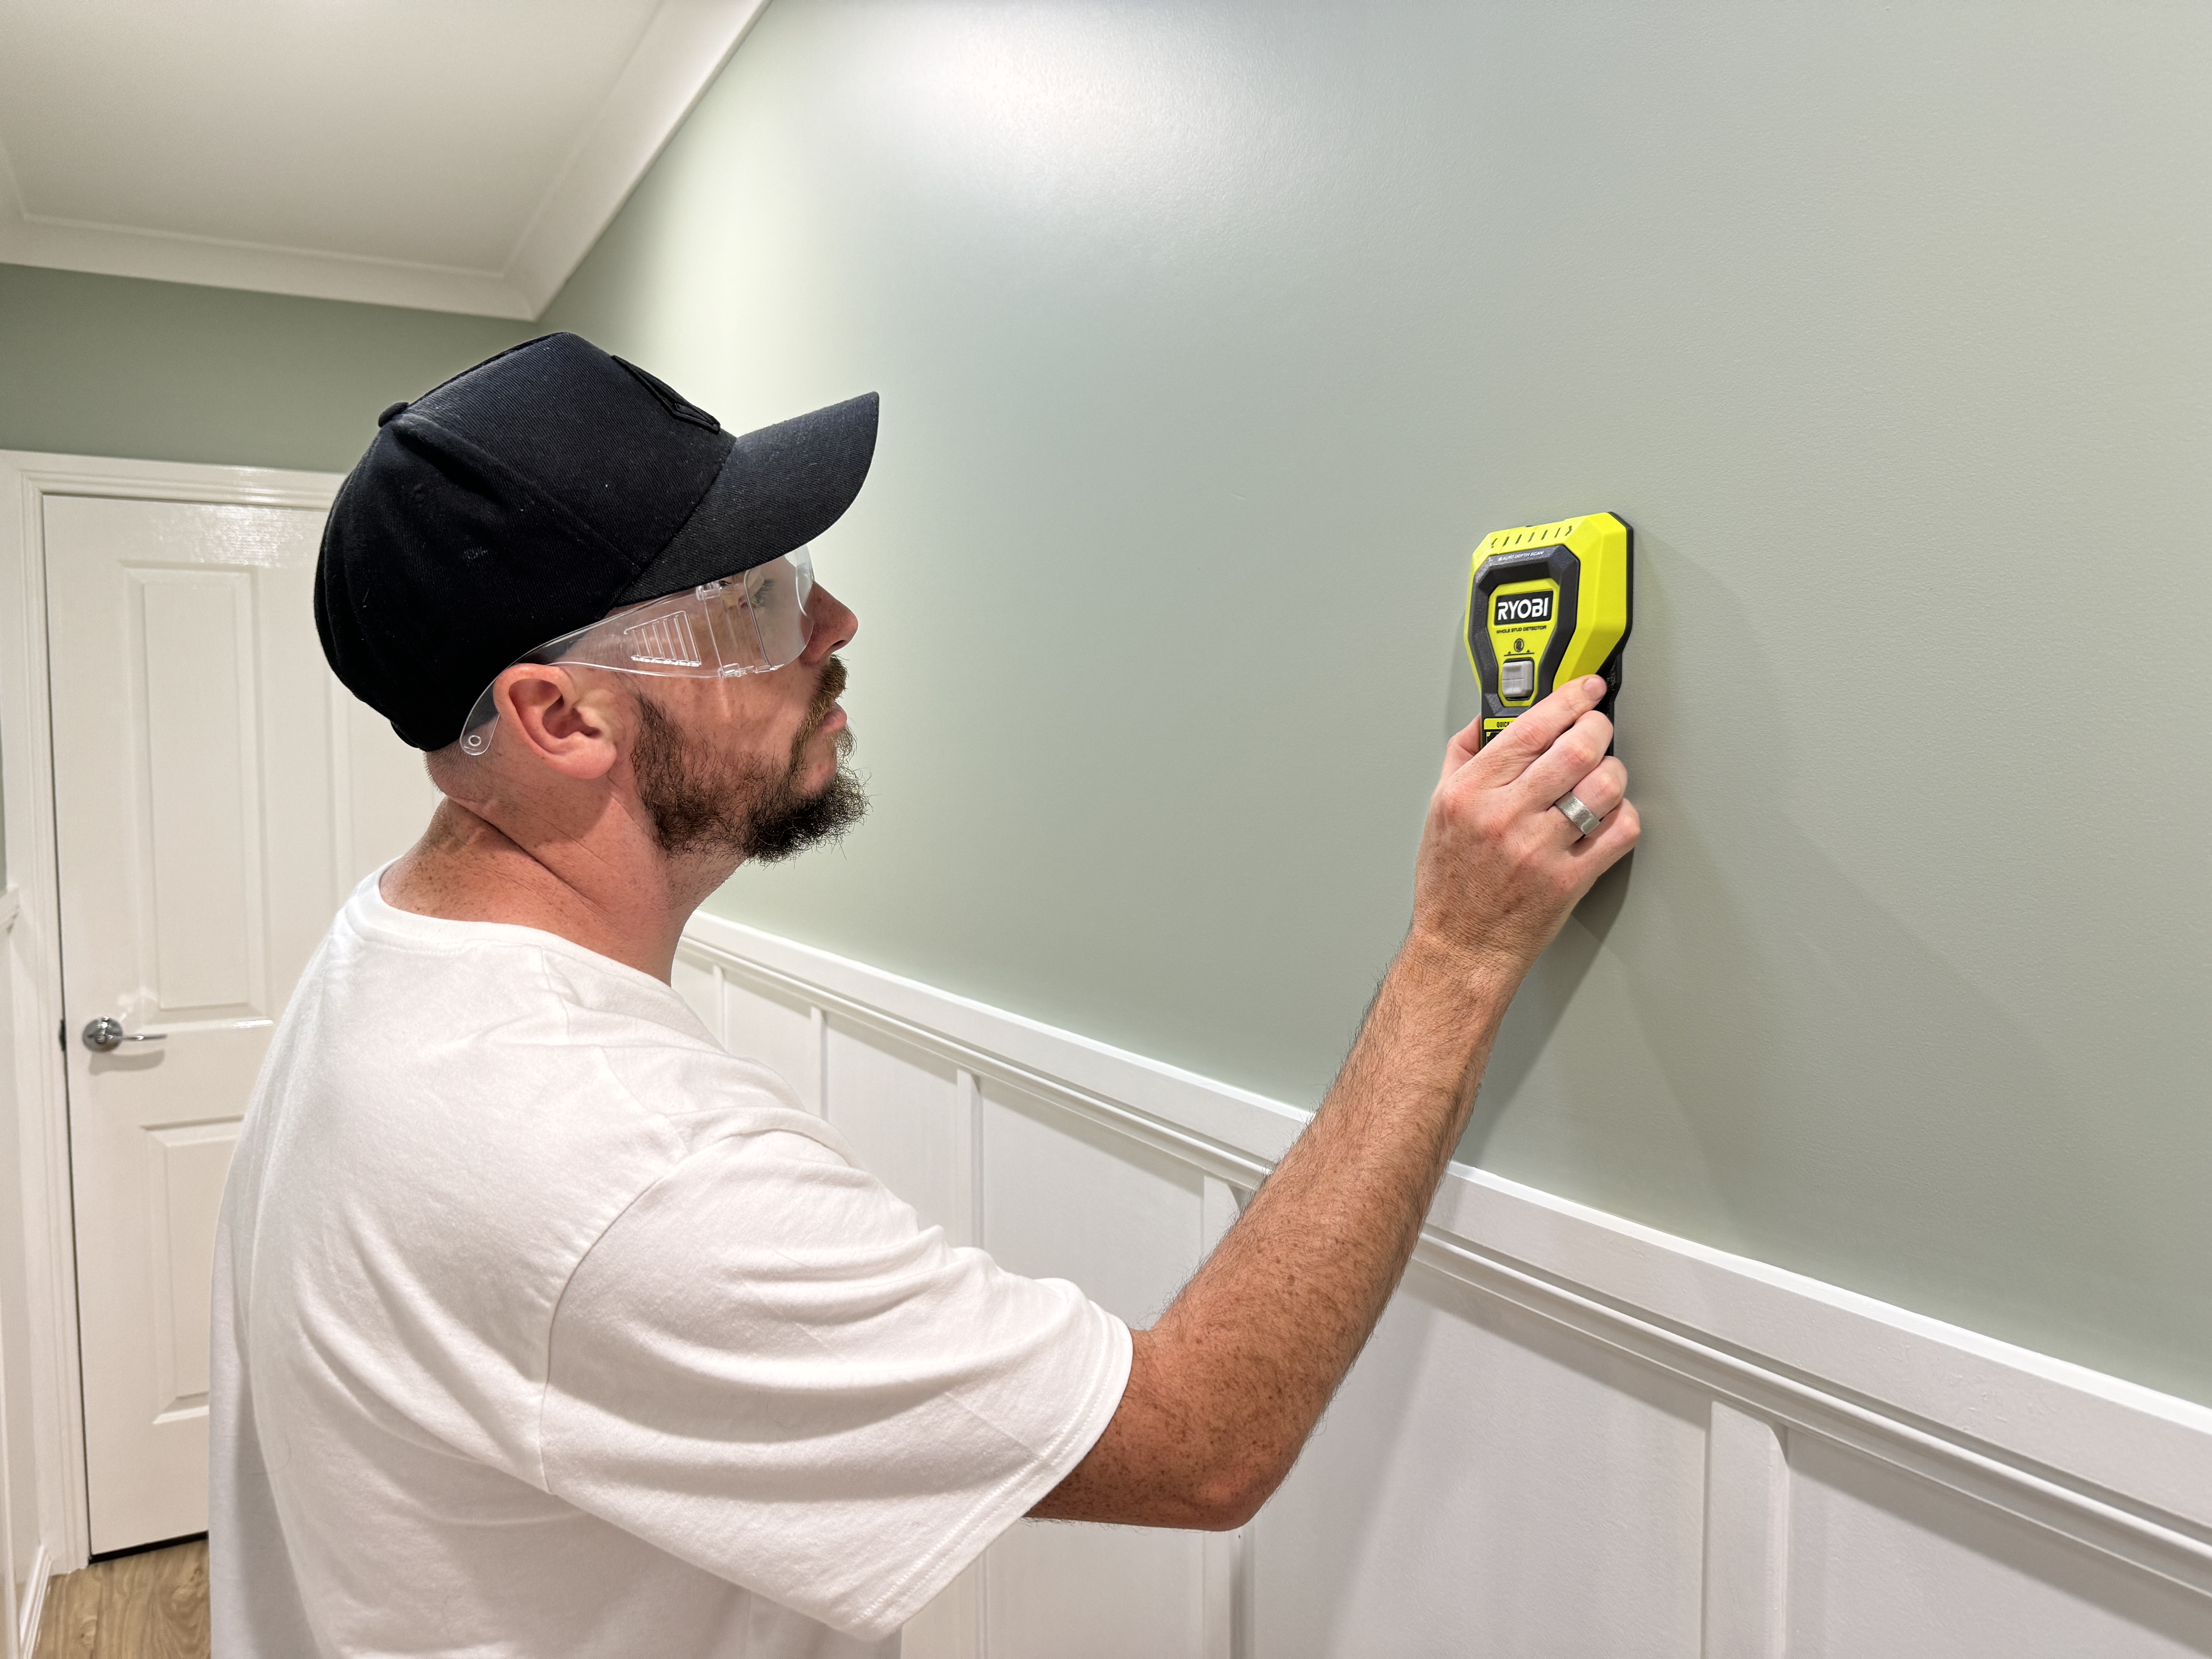
Using your Tape Measure, find and mark the centre point of your wall, as well as your photo arrangement. Use your stud finder to locate any electrical wiring behind the wall and avoid drilling anywhere electricity is detected.
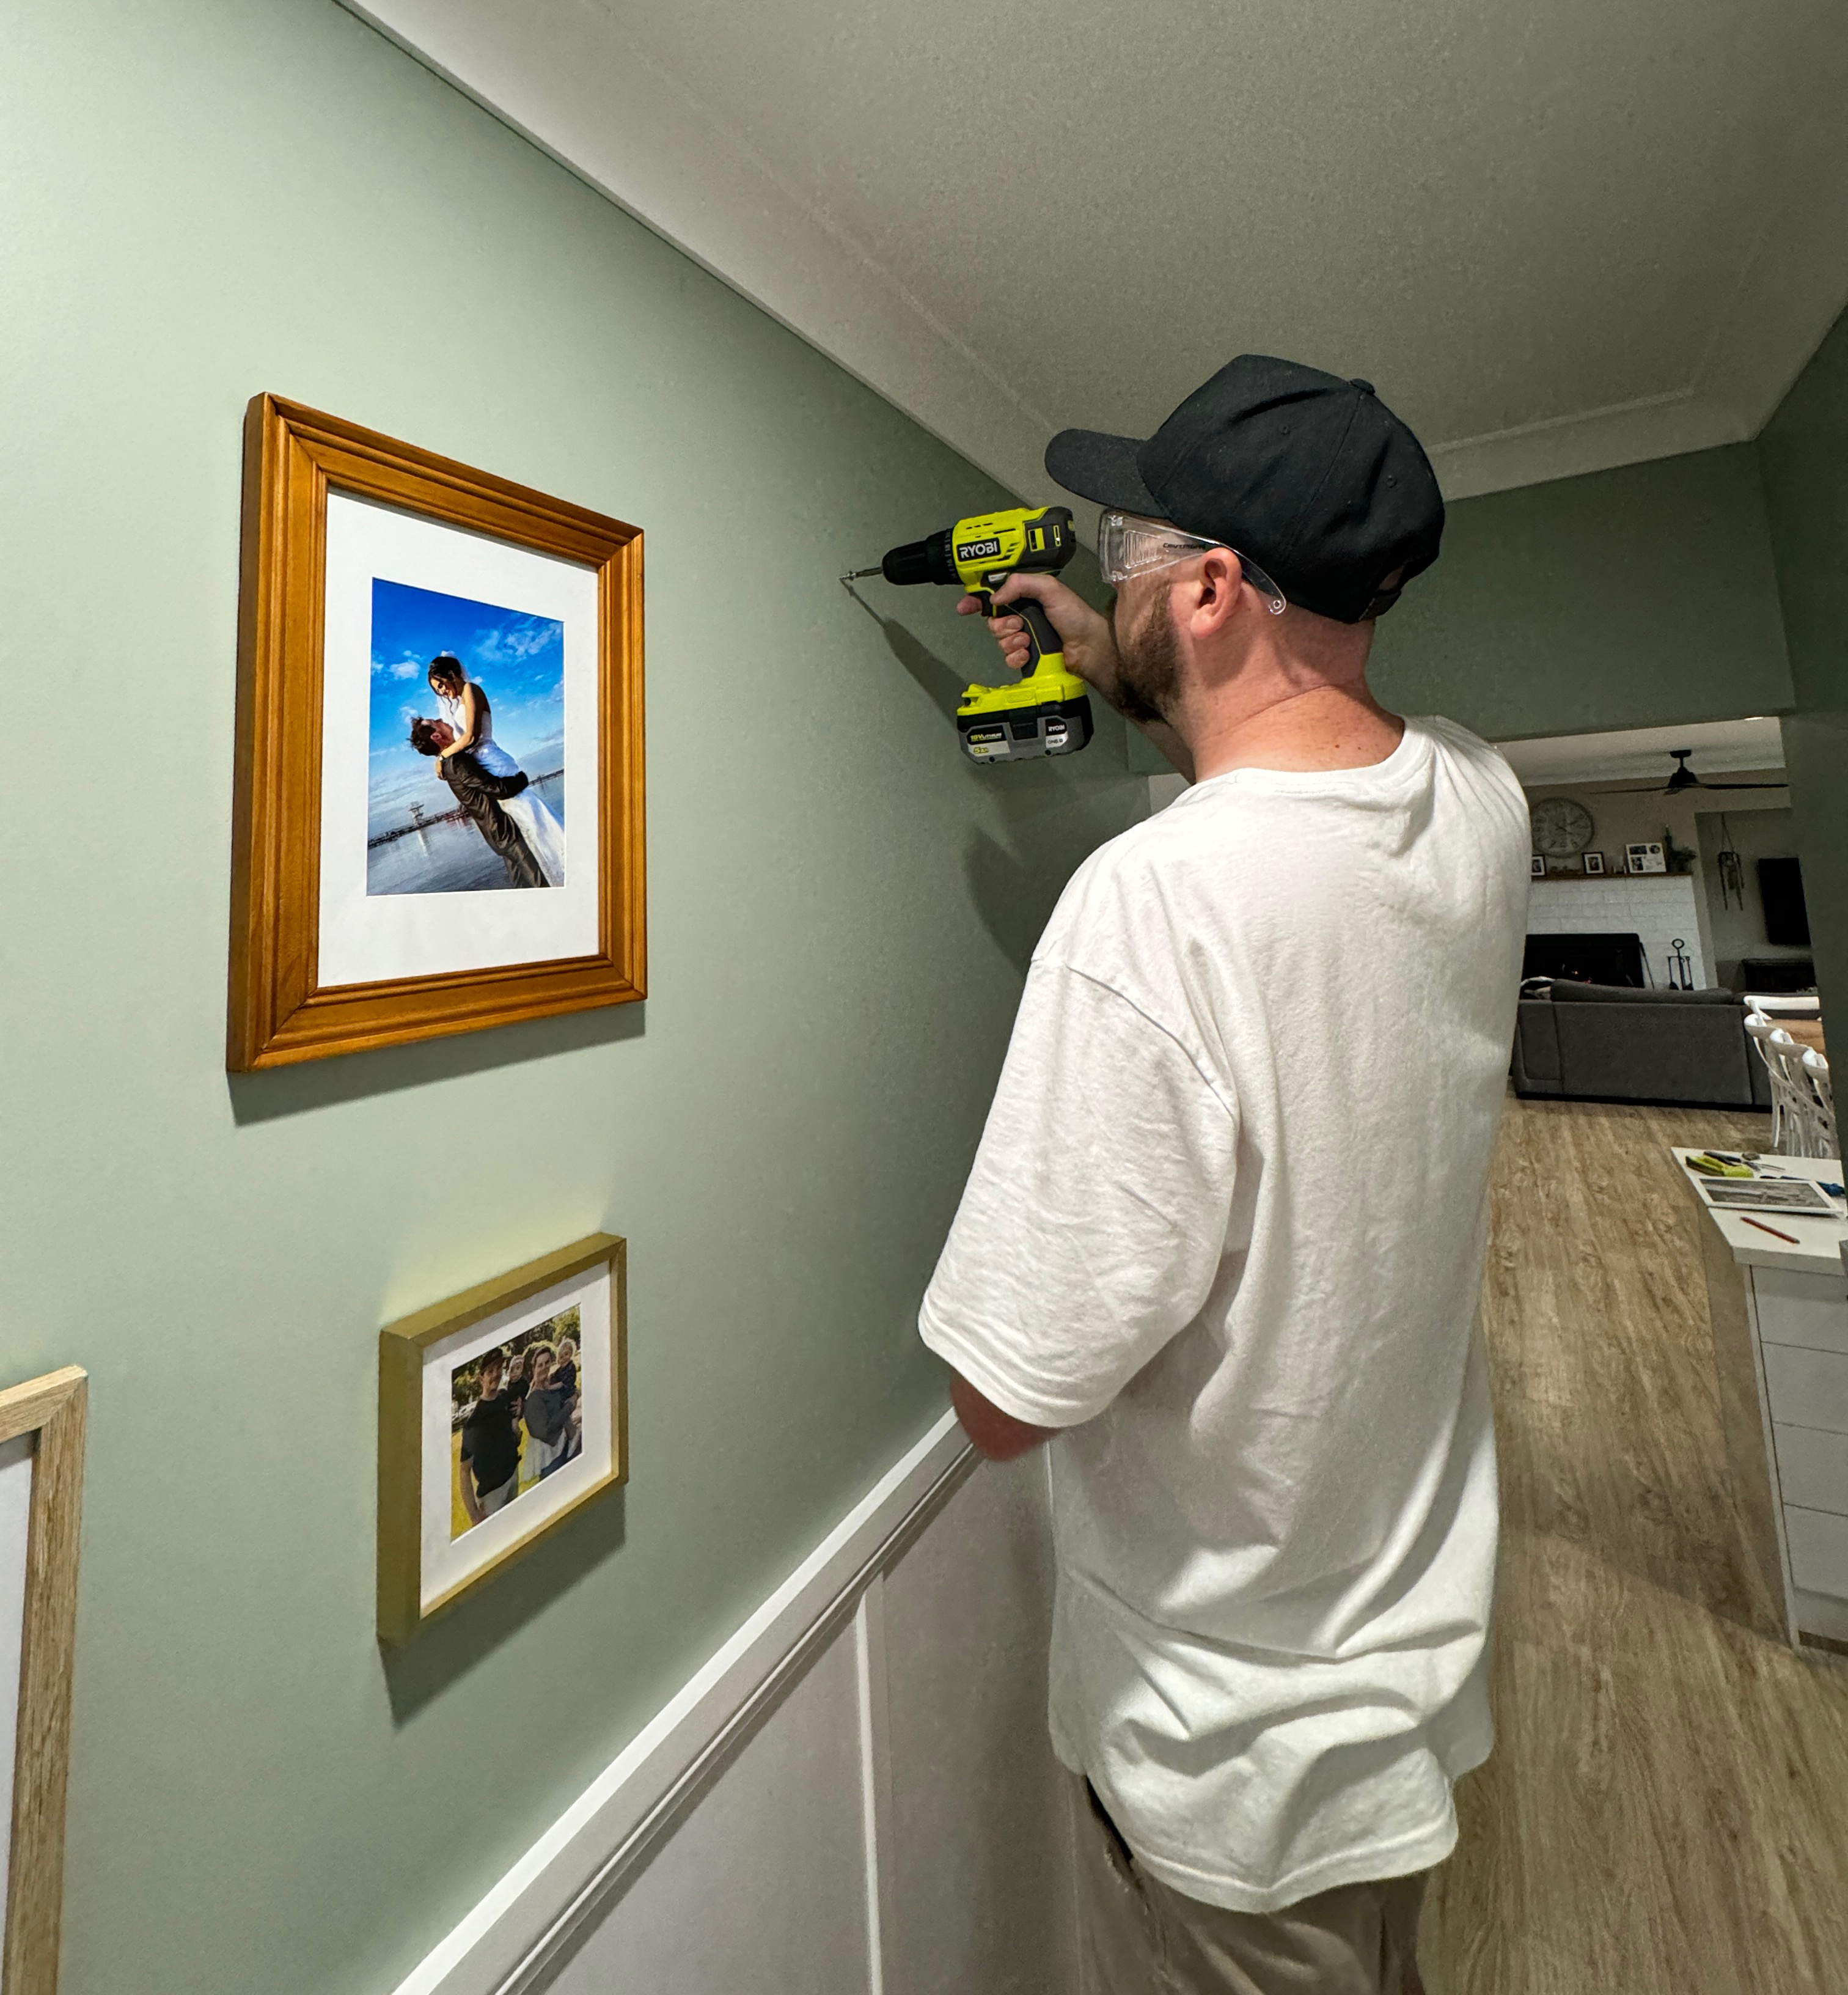
Using your Drill/Driver on the slow setting, screw in the Plasterboard Picture Hanging Screw and hang the photo frame that is in the centre of your arrangement.
Now that you have your centre photo frame installed, copy the layout of your photos onto the wall, spacing the remainder of your photo frames outwards from the centre.
Enjoy and show off your finished product!
Looking for inspiration, tips and ideas? Create a home that reflects your unique personality and taste.
.png?w=100&v=6c04e2a3-04b9-449c-97a0-86f8df82dcb1&itok=D7d8Umfz)

.png?w=100&v=07272864-2df4-45f0-aa93-568aa3920466&itok=Lj7SSICT)

.png?w=100&v=4297d0f7-8d6a-4632-bff2-7c593a97d3cb&itok=fnsLcLhG)


.png?w=100&v=6fe76245-ac4a-4aa3-986d-04347f143028&itok=dFif4A99)


